Quick Links
Just bought yourself or received a new pair of AirPods or AirPods Pro? Welcome to the truly wireless earphones life. Setting up AirPods is quite straightforward, but here's how to customize and get the most of your AirPods or AirPods Pro.
How to Pair Your AirPods or AirPods Pro to iPhone and iPad
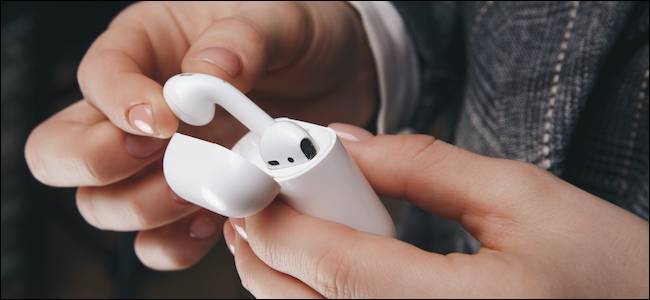
Pairing your new headphones is as simple as it gets. After you unbox your AirPods, hold them near your unlocked iPhone and iPad and flick the case open.
Then, press and hold the "Setup" button, which is at the back of the AirPods case. In a couple of seconds, you'll see a connection prompt on your iPhone or iPad.
If the prompt doesn't appear automatically, try holding the physical button on the back of the case for several moments to enable pairing mode.

Next, all you have to do is tap the "Connect" button.

If you're using second-generation AirPods or AirPods Pro, you'll also receive a prompt asking if you want to enable the Hey Siri functionality or if you want Siri to read messages out to you aloud.
Once you tap the "Done" button, your AirPods will be connected and paired. You should now see battery life information in the pop-up message.

If you're signed in to iCloud, your AirPods will be automatically paired with all of your Apple devices (including iPhone, iPad, Mac, and Apple Watch).
How to Know Your AirPods or AirPods Pro Charge Status

When you flip open your AirPods case, you'll see a status light in between the two AirPods. For the AirPods Pro and AirPods Wireless Charging Case, the status light is on the front of the case. Tap on the case to see the status.
This light basically tells you what's going on with your AirPods or AirPods Pro. Here's what everything represents:
Amber light (with AirPods attached): AirPods are charging.
Amber light (without AirPods attached): Less than full charge remaining in AirPods case.
No light: Your AirPods are out of battery and need to be charged.
Flashing white light: AirPods are ready to connect.
Flashing amber light: There's a pairing error and AirPods might need to be reset.
How to Customize Your AirPods or AirPods Pro
Once you've paired, connected, and started using your AirPods, it's time to customize them. On your iPhone or iPad, head to Settings > Bluetooth and tap the "i" button next to your AirPods.

Here, first, tap the "Name" option to rename your AirPods.

Type in the new name and then tap the "Done" button found on the keyboard. Tap the "Back" button to go back to the AirPods menu.

Next, let's customize the AirPods' double-tap gesture. While the default option brings up Siri, you can replace it with Play/Pause, Next Track, Previous Track actions, or disable it altogether.
Tap the "Left" or the "Right" option and then choose a new action from the menu.

If you're using AirPods Pro, you'll have a different set of options. The AirPods Pro doesn't have an ear-tap feature. Instead, you squeeze the stem of the AirPod to invoke an action.
Under the "Press And Hold AirPods" section, choose the "Left" or the "Right" option to customize it.
From here, you can choose Noise Cancellation, Transparency mode, or you can turn the feature off altogether.

If you don't like the fact that AirPods automatically stop playback when you remove them from your ear, you can disable the feature by tapping on the toggle next to "Automatic Ear Detection."

How to Pair AirPods or AirPods Pro with Mac
If you've already paired your AirPods or AirPods Pro with your iPhone or iPad, they'll automatically be paired with your Mac as well (as long as you're using your iCloud account on all devices).
To connect to AirPods that are already paired, all you have to do is open the Bluetooth menu, select your AirPods, and then click the "Connect" option.

You can also pair AirPods directly to your Mac. To do this, go to System Preferences > Bluetooth. Here, make sure that Bluetooth is enabled and then press and hold the "Setup" button on your AirPods charging case.
After a couple of seconds, you'll see your AirPods in the Devices list. Here, simply click the "Connect" button.

You can now connect or disconnect your AirPods from the Bluetooth menu.
How to Use AirPods or AirPods Pro with Apple Watch
If you've paired your AirPods with your iPhone, they'll be paired to your Apple Watch as well.
To use AirPods or AirPods Pro directly with your Apple Watch, go to the wearable's Control Center, tap the "AirPlay" button, and choose your AirPods.

You can also bypass your iPhone and pair your AirPods directly to your Apple Watch from the Settings app.
How to Find Lost AirPods or AirPods Pro
Apple's Find My AirPods tool is directly integrated into the new Find My app on the iPhone. As long as you're using the Find My iPhone feature, you can use it to track your lost AirPods, too (from the Find My app or from the iCloud website).
To find your lost AirPods or AirPods Pro, open the "Find My" app and choose your AirPods.

From here, you can see the last location where they were connected. If you see a green dot, it means your AirPods are online. A gray dot means that they are offline. Either they are out of range or the battery has died.
If you see a green dot, you can play a sound to look for the AirPods nearby. If you can see the last location, tap the "Directions" button to navigate to it.

How to Manually Connect to AirPods or AirPods Pro on iPhone or iPad
AirPods are supposed to work magically. You put them in your ear, and they're automatically paired with your iPhone or iPad (whichever is your most recently used device).
But sometimes, it just doesn't work. In times like these, when your AirPods or AirPods Pro are already in your ears and the case is back in your pocket, you can use the Control Center.
Here, tap the "AirPlay" shortcut from the Now Playing control.

From here, choose your AirPods to switch to them.

You can do this from the AirPlay menu from anywhere in the operating system, such as from the lock screen widget or the Music app.
How to Check AirPods or AirPods Pro Battery Life
You can check your AirPods battery life from your Apple devices in a couple of ways.
The easiest way is to bring up Siri and asking the virtual assistant something like, "AirPods battery?" and having it read out to you.

You can also add the Batteries widget to the Today View on iPhone or iPad. From the Today View (swipe paste the left-most Home screen), scroll to the bottom of the list, and then tap the "Edit" button.

From there, tap the "+" button next to the "Batteries" option to enable the widget.

Rearrange the widgets if you want, and then tap the "Done" button.
Now, you'll be able to see the battery life of your AirPods when they're connected to your iPhone or iPad.

How to Use Two AirPods or AirPods Pro at Once
If you're running iOS 13 or iPadOS 13 and above, you can use two sets of AirPods or AirPods Pro with your iPhone or iPad at the same time.
There are two ways to do this. The first method is fairly simple. All you have to do is pair the second set of AirPods to your iPhone or iPad following the same process as explained previously.
From there, you'll be able to select the second pair of AirPods from the AirPlay menu (found in Control Center) to start playback for both devices.

The second option doesn't require you to pair the second set of AirPods. Using the new Audio Sharing feature in iOS 13.1 and iPadOS 13.1, you can share the audio to a friend's AirPods via their iPhone or iPad.
To do this, go to the AirPlay menu from the Control Center (or from the media app that you're using) and tap the "Share Audio" button.

Now, bring the other iPhone or iPad near your device (with the AirPods connected to them). Once you see their device, tap the "Share Audio" button.

Once the device is connected, tap the "checkmark" next to it to start playing audio on both devices.

How to Update AirPods or AirPods Pro Firmware
To update your AirPods firmware, start by first connecting your AirPods to a power source and then pair them with your iPhone or iPad. As long as your device is nearby, it will automatically download and install any firmware updates in the background.
Sadly, there is no interface or confirmation for this process. What you can do is check if your AirPods are running the latest firmware. But to do that, first, you have to check online for the latest firmware version.
Next, go to Settings > General > About and select your AirPods. Here, take note of the firmware version to see if you have the latest version installed.

Once you start using your AirPods regularly, you'll notice that they tend to get dirty quite quickly. Here's how to easily clean your icky AirPods.