Quick Links
Ever wonder how radio and podcast hosts get their signature sound? While some of it comes from their better hardware, a lot of it comes down to post-processing, which is editing the audio after it's recorded (or sometimes while it's live) to make it sound much better. You can use the same techniques to make your microphone sound better.
The two apps we will be using for post processing our audio are Adobe Audition and Audacity. Audition is an excellent tool with a clean interface. Audacity is free, but lacks some features and is a bit harder to use, but either one is sufficient for our uses.
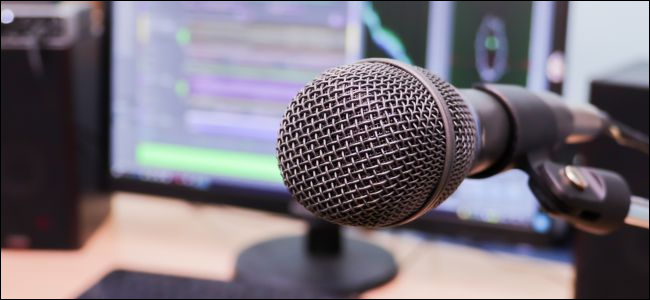
Buy a Standalone Microphone

While post-processing can help make your microphone sound much better, you still want a good starting point in the form of a decent mic. The primary concern here is noise. While audio post-processing apps like Audacity are great at EQing your voice and making flat audio sound professional, it can't get rid of noise very well. Built in microphones are usually small and pick up a lot of noise from inside your device's case. Large, standalone mics are generally much less noisy.
A great microphone could easily cost hundreds of dollars, but unless you're an audio professional, you'll see diminishing returns on audio quality, as even something like the TONOR BM-700 at just $30 will sound incredible compared to your laptop or phone's built mic.
Noise Reduction

Most mics, even high-end ones, aren't entirely quiet, and getting rid of annoying background hiss is one of the first steps in cleaning up your audio.
The spectral frequency display in Audition is useful for visualizing noise. It shows levels of noise at each frequency, over time. Before noise reduction, you can see here at the end of the audio (while I wasn't talking) there's still a lot of data. Looking closer, these lines of noise stretch across all of the audio.

After noise reduction, there's still noise, but there's much less of it.

Because it cuts out those frequencies, this does distort the audio a little bit, which is where having a less noisy microphone comes in handy, as you can only do this so much without it sounding like you're talking through a tin can.
You can perform noise reduction in a lot of different ways, but one of the best ones uses something called a noise print to selectively cut out noise, and is useful for all kinds of noise. There are a lot of other effects, like hiss remover, that you can use to mitigate different frequencies, and adaptive noise reduction, which doesn't need a noise print.
In Audition, you'll have to first capture a noise print before you can use the noise reduction. Select a quiet bit of audio, and select Effects > Noise Reduction > Capture Noise Print.

Next, select "Noise Reduction (Process)" under the same menu. This will open up a dialog where you can configure the reduction settings.

Default settings are usually fine, but you can adjust the noise floor if you'd like. This display shows you how much noise it's capturing at each frequency. You can preview the sound with the "Play" button in the bottom left corner before applying your changes. You can also select "Output Noise Only" to preview all the noise getting removed. When doing this, try to keep the main recording out of the noise to minimize the distortion.
In Audacity, just choose Effect > Noise Reduction. From here you can set the noise profile and a few other settings.

Audacity is not as fully featured as Audition's noise removal but will get the job done.
Equalization

Equalization, or EQing, is adjusting the volume of different pitches in the audio. For example, you could turn the bass up or cut it out entirely. In practice though, the art of the EQ is a lot more subtle and revolves around minor tweaks to make the audio sound good. If you're going for a deep radio voice, you might think you should just crank up the bass, but in fact, this will make your voice sound boomy and won't produce the effect you want.
The "Vocal Enhancer" preset in Audition will probably be best. This preset cuts out the very low bass and boosts the frequencies where vocals usually exist. You can open this window under Filter and EQ > Parametric Equalizer. Like the noise reduction, you need to select a portion of the audio to EQ, and you can preview your changes with the "Play" button.

You can EQ in Audacity as well under Effect > Equalization.
Compression and Normalization
One problem you might have with your mic is how loud it is the closer you are to it. You may end up with something like the image shown above, with parts of the audio very quiet and parts very loud in a clip you'd like to be uniform.
Compression solves this problem. This type of compression is different from traditional digital compression, which is used to reduce file sizes. Audio compression tries to make the clip more uniform in volume. Here's the same voiceover from above, but with a compressor applied:
Note that this does also increase background noise volume in the pauses, and on quieter parts.
This is actually what most songs on the radio do, referred to as the "Loudness Wars". Take a look at this waveform of the radio edit of a Metallica song versus a downloadable version:
The radio edit is compressed and normalized to 100%, while the downloadable version has dips in volume levels. This is an extreme example though, and you'd never really compress your audio this much in practice. Sometimes this extra information for "loudness" is useful, like for music, but for things like voiceovers you'd want it to be fairly uniform.
Normalization is similar to compression and is usually the last step you'll run. It takes your whole clip, and makes the loudest part 100% volume. This is useful for keeping a uniform volume between different clips. So compression makes volume uniform within clips, and normalization makes it uniform between clips. Used together, your audio will sound much better.
Doing it Live
Both Audition and Audacity work mostly on prerecorded audio, so they're not too useful for live streaming by themselves. In order to get the output picked up in something like OBS, you need to route the audio inside your computer.
For this, we'll use VB Cable by VB-Audio, a completely free program. VB Cable creates a "virtual output" that you can choose as your speakers. It sends your system audio to another virtual input that you can set as your microphone in any application. You won't actually hear the output while using the virtual output, which is good.
Audition has a monitor feature under the Multitrack section, which you can use to apply some effects in realtime and then output them to your headphones to monitor. Usually, this would let you listen to your microphone as you record. However, if you choose the virtual cable input as the output device, VAC will route it to a microphone input you can capture in OBS. A pretty hacky solution, but it's the only way to run Audition effects live on your audio.
You can't use every feature, like noise-print-based noise reduction and other things that need prerecorded audio, but many features will still work. Keep in mind that doing this with a lot of effects is CPU-intensive and could effect the performance of your system while running.
If you don't have Audition, or don't need a full suite, you can do some basic EQing and mastering in VoiceMeeter Banana, also made by VB-Audio. Banana is the pro version of regular VoiceMeeter, but they're both free.
Banana packs a full parametric equalizer you can use to adjust your mic's sound in real time.
There are a few other good features, like a noise gate and some basic noise suppression. And of course, you can mix multiple inputs and outputs before sending them to OBS.
And if all of this doesn't suit your needs, you can always use VST plugins in OBS.
Image Credit: lapandr/Shutterstock